BARRY'S LATEST HOMEMADE TOOL AND INNOVATION summer 2014
In the past I mentioned that I would start posting some of my inventions, innovations and improvements to existing
products. The first was the Grass Whip with replaceable blades, a la, the utility knife is going strong, in my yard anyway. I know grass whips have been around for a while but they are fabulously inefficient with that dull serrated blade that does more pulling than cutting. I contend that this refinement of the grass whip gives it some serious credibility and makes the tool much more useful. I would much rather take this to the weeds and tall grass, and make short work of them. Rather than wrestling with the 100 foot cord for my electrical weed whacker. And, don’t get me started on those super annoying, pollution belching gas powered, two stroke neighbour antagonizers. But, maybe there is some value in that?
I have further refined the replaceable bladed grass whip concept, but, I have yet to build the next revision of my grass whip. The next iteration will use the blades that are for carpet tools. Those blades are super sharp on both sides and are much more durable - they are made with stronger steel. The carpet knife blades and are ¾” X 3” approximately and have a slot right down the middle. So, that means the cutting bar (to affix the blades to) will be much simplified and will only require fastening the blades to it and it will not be as involved as the previous designs.
Please check out the You Tube links above where I have posted a couple of movies of me laying waste to some tall grass and weeds around the house. To have this made I have to incorporate some Lean Manufacturing principles. That is, sales will pull the product through manufacture. Rather than making one thousand units, storing them and then selling them. So, if you would like to buy one of these, please let me know via the contact form on the first page of this website and that will help me get a green product to market. The complete history of this tool is under MORE at top right of the page. Further, drop down to NEW PRODUCTS.
Here are two You Tube links of the Grass whip in action - Sorry I couldn't find a better looking model:
https://www.youtube.com/watch?v=mveTfUE0BnI&feature=youtu.be
and, another longer better video:
https://www.youtube.com/watch?v=H6MSUOEWjDk
Homemade Painters Helper
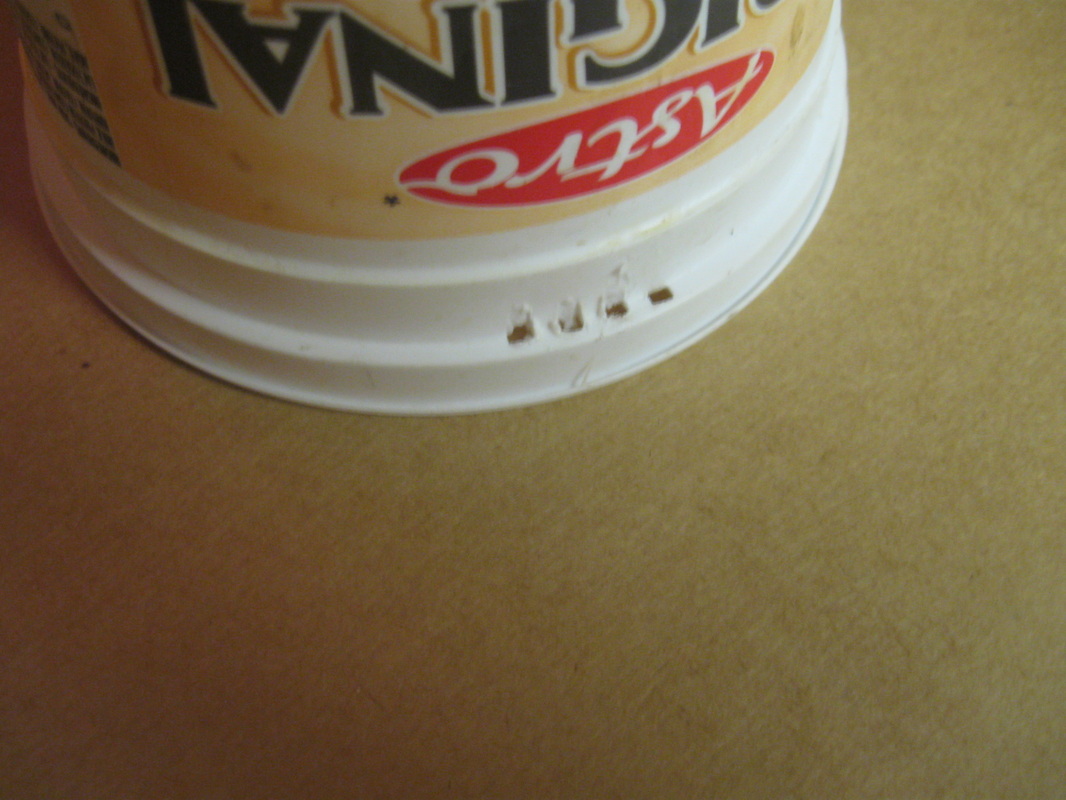
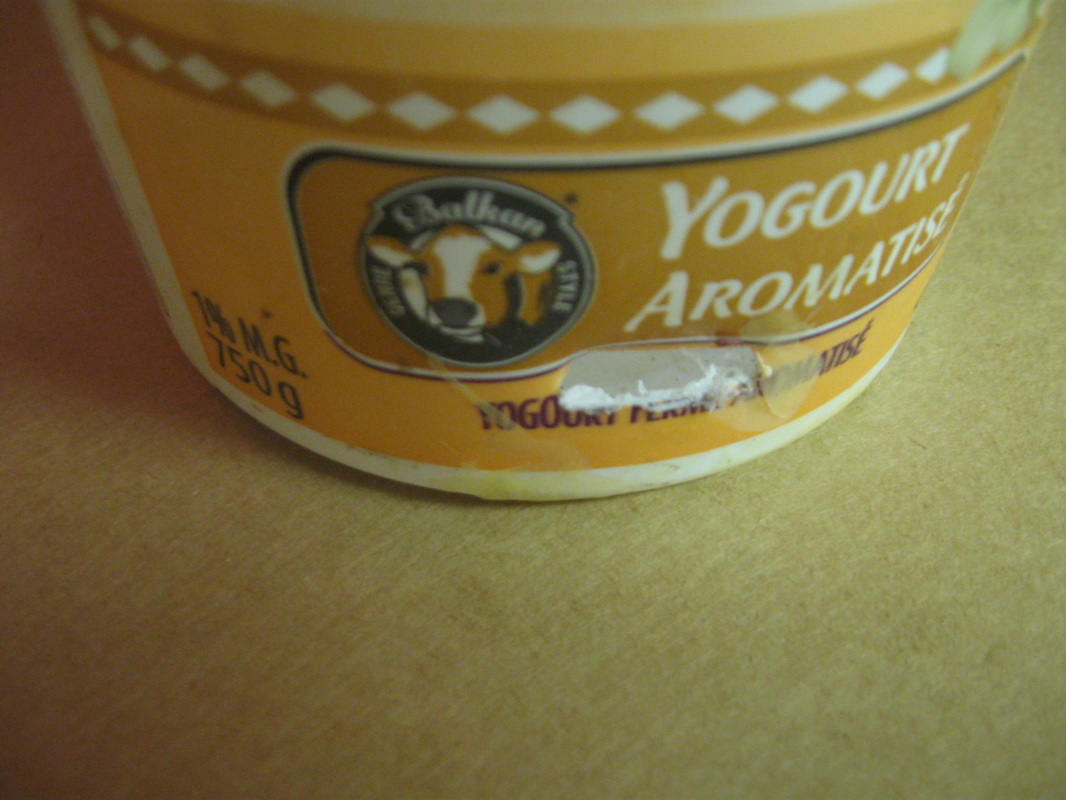
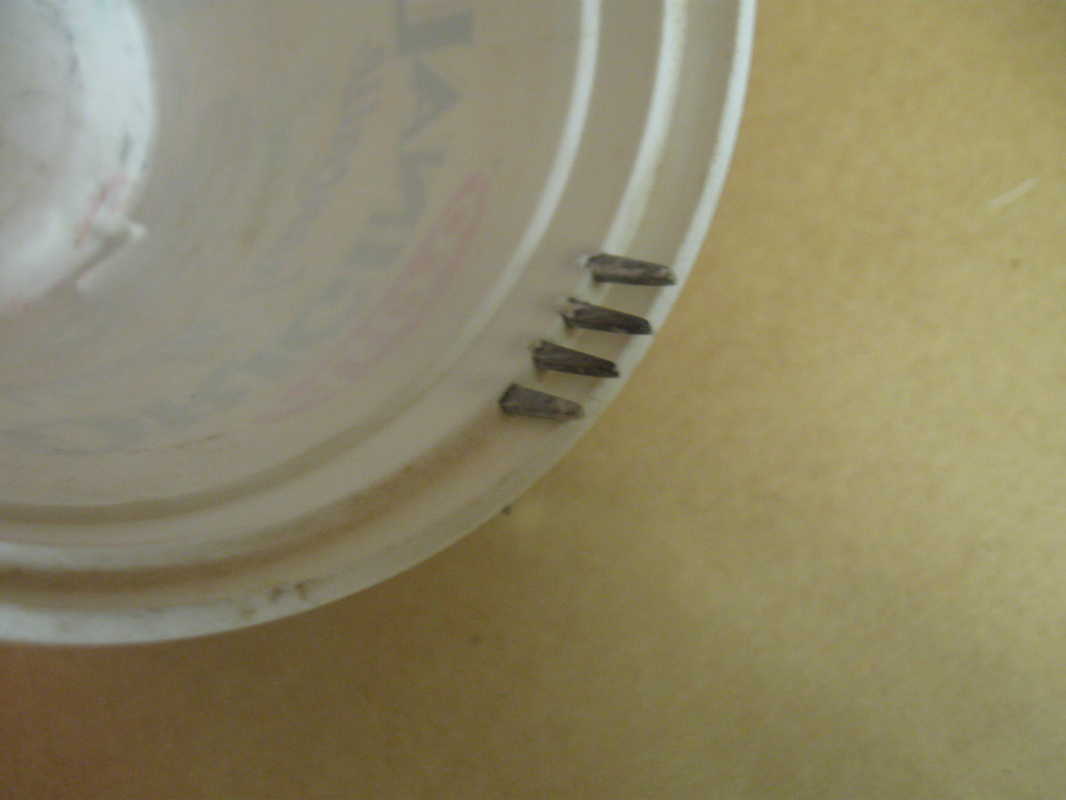
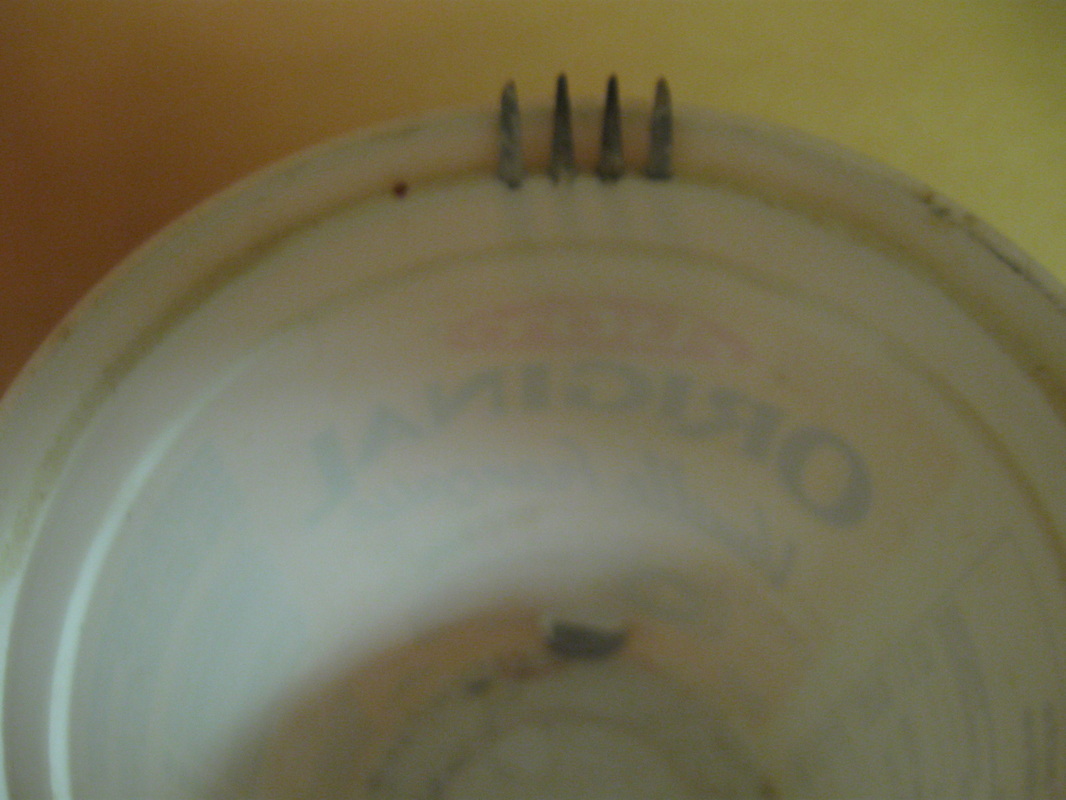
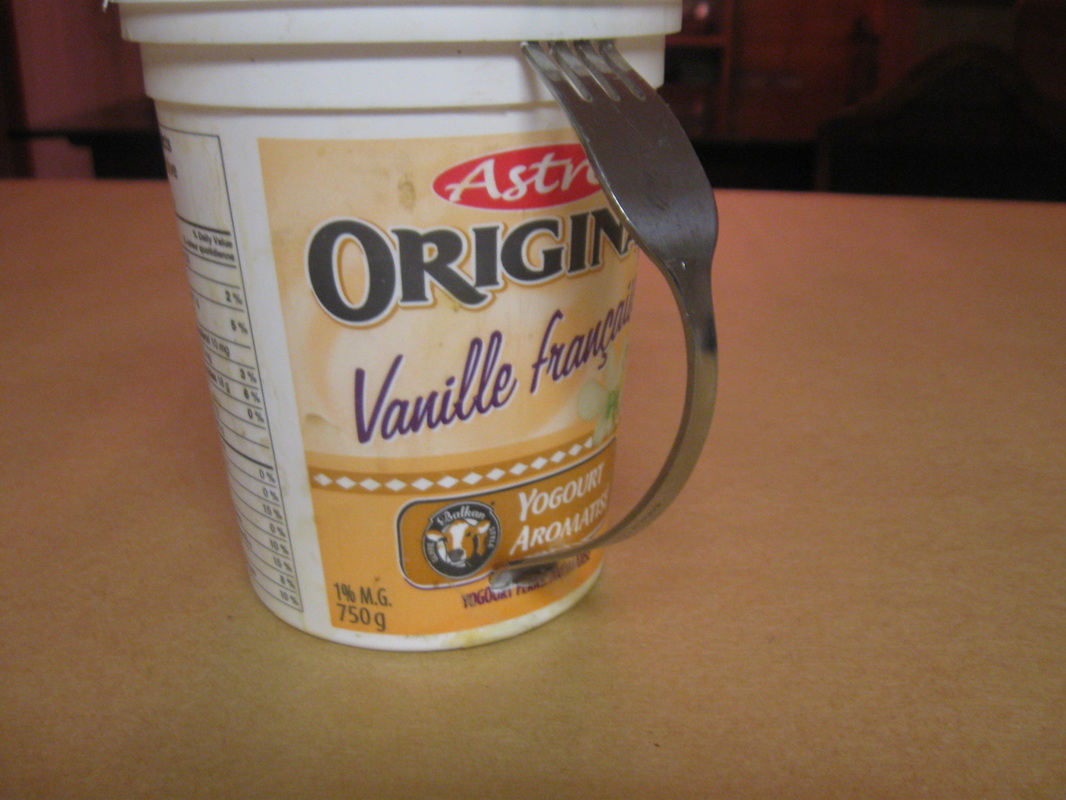
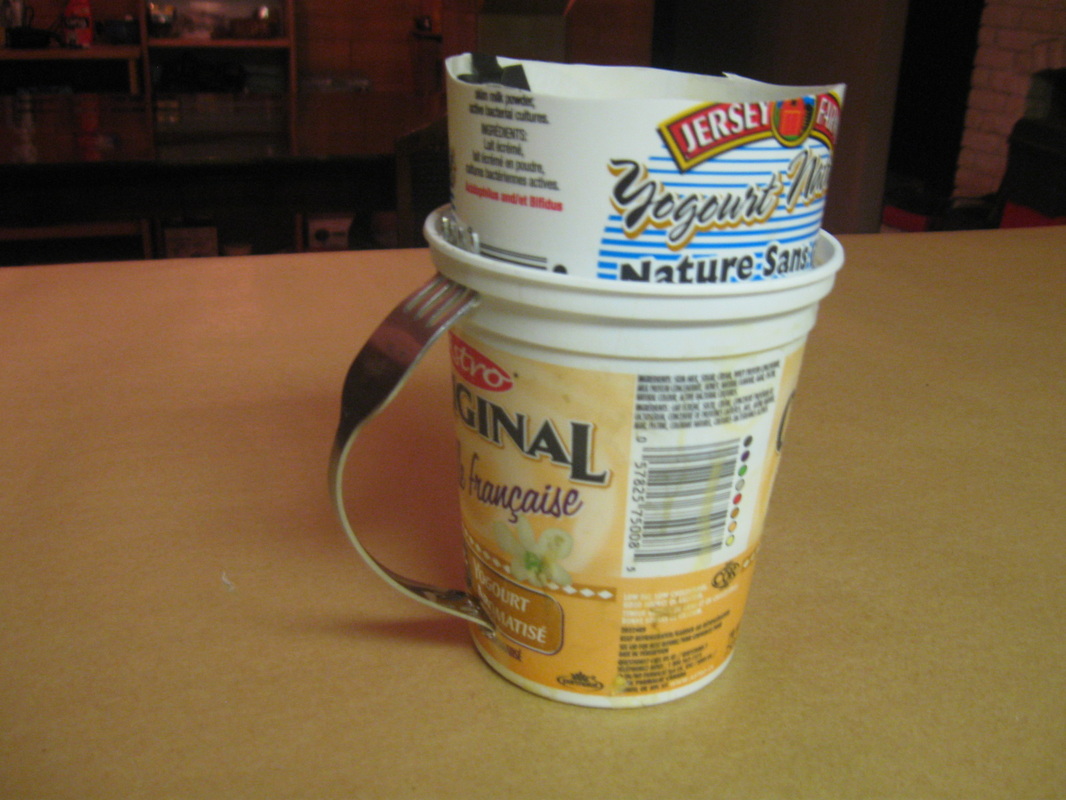
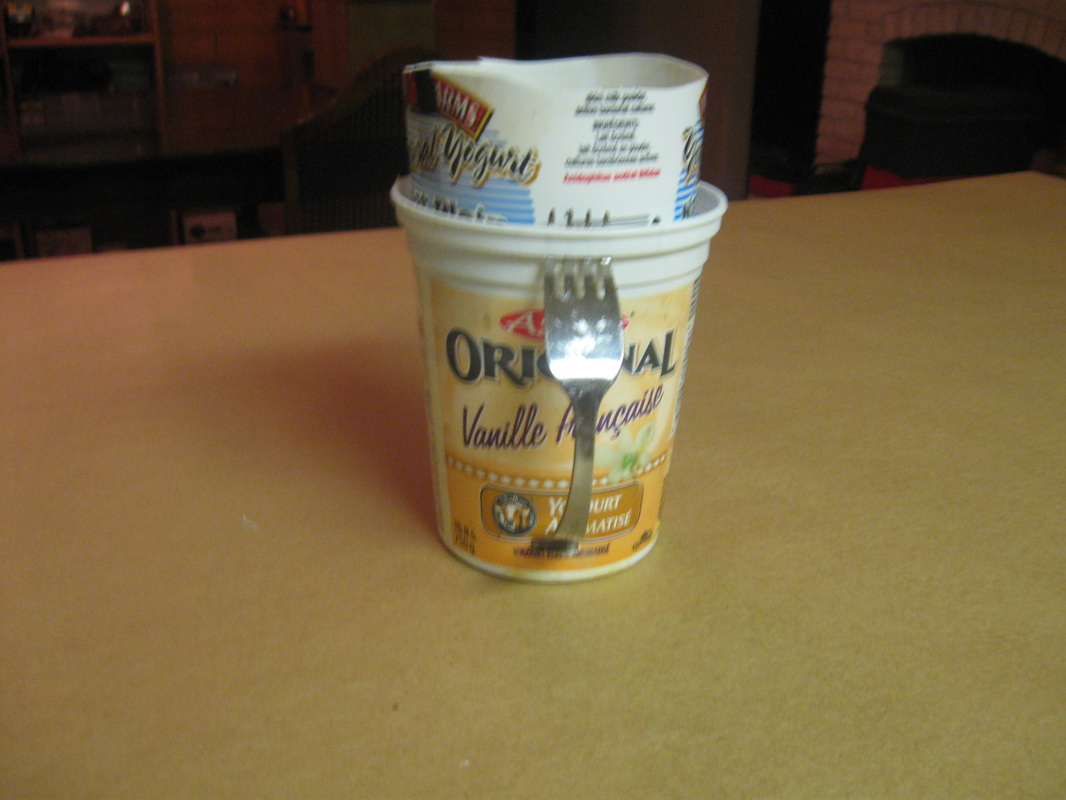
Next, is a useful little item meant for professional painters and those that just need to do some painting around the house. In the big box stores you can find portable paint containers with disposable liners which allow you to carry a small amount of paint conveniently. They work well enough, but at a cost $20 and up including the liners, they are not cheap. Especially if you have several painters doing brush work. Shown below, are some up-cycled one liter dairy containers that I have converted as paint holding / carrying accessories. I hope you make one or two for yourself.
I think just about everyone has plastic one liter dairy containers in their home and some sacrificial old forks too. First you take the fork (6-7 inches) and bend it to the shape of a handle that your hand can fit through, while at the same time grasping the one liter container. It takes a bit of work to get the shape right and the best thing to do this with is a bench vice. After you have the rough shape of the handle correct, bend the last half inch of both the business end of the fork and handle, out to about 45 degrees. Heat the fork up with a torch, or whatever is handy, just enough so both ends of the fork can melt through the container. Heat and push the reshaped fork just enough into the dairy container so as to create receptacles in the container for the fork's both ends. After you have melted the holes on the container and the fork / handle is now cooled, compress the fork enough to seat both ends in the container. When the fork goes back to its handle shape its tension will keep it seated. Now, you have a paint holder that can hold one liter of paint or stain or whatever. If you are up to it, you can tape a rare earth magnet to the inside of the paint container to hold your brush upright. The pictures are pretty self explanatory.
In the past I mentioned that I would start posting some of my inventions, innovations and improvements to existing
products. The first was the Grass Whip with replaceable blades, a la, the utility knife is going strong, in my yard anyway. I know grass whips have been around for a while but they are fabulously inefficient with that dull serrated blade that does more pulling than cutting. I contend that this refinement of the grass whip gives it some serious credibility and makes the tool much more useful. I would much rather take this to the weeds and tall grass, and make short work of them. Rather than wrestling with the 100 foot cord for my electrical weed whacker. And, don’t get me started on those super annoying, pollution belching gas powered, two stroke neighbour antagonizers. But, maybe there is some value in that?
I have further refined the replaceable bladed grass whip concept, but, I have yet to build the next revision of my grass whip. The next iteration will use the blades that are for carpet tools. Those blades are super sharp on both sides and are much more durable - they are made with stronger steel. The carpet knife blades and are ¾” X 3” approximately and have a slot right down the middle. So, that means the cutting bar (to affix the blades to) will be much simplified and will only require fastening the blades to it and it will not be as involved as the previous designs.
Please check out the You Tube links above where I have posted a couple of movies of me laying waste to some tall grass and weeds around the house. To have this made I have to incorporate some Lean Manufacturing principles. That is, sales will pull the product through manufacture. Rather than making one thousand units, storing them and then selling them. So, if you would like to buy one of these, please let me know via the contact form on the first page of this website and that will help me get a green product to market. The complete history of this tool is under MORE at top right of the page. Further, drop down to NEW PRODUCTS.
Here are two You Tube links of the Grass whip in action - Sorry I couldn't find a better looking model:
https://www.youtube.com/watch?v=mveTfUE0BnI&feature=youtu.be
and, another longer better video:
https://www.youtube.com/watch?v=H6MSUOEWjDk
Homemade Painters Helper
Next, is a useful little item meant for professional painters and those that just need to do some painting around the house. In the big box stores you can find portable paint containers with disposable liners which allow you to carry a small amount of paint conveniently. They work well enough, but at a cost $20 and up including the liners, they are not cheap. Especially if you have several painters doing brush work. Shown below, are some up-cycled one liter dairy containers that I have converted as paint holding / carrying accessories. I hope you make one or two for yourself.
I think just about everyone has plastic one liter dairy containers in their home and some sacrificial old forks too. First you take the fork (6-7 inches) and bend it to the shape of a handle that your hand can fit through, while at the same time grasping the one liter container. It takes a bit of work to get the shape right and the best thing to do this with is a bench vice. After you have the rough shape of the handle correct, bend the last half inch of both the business end of the fork and handle, out to about 45 degrees. Heat the fork up with a torch, or whatever is handy, just enough so both ends of the fork can melt through the container. Heat and push the reshaped fork just enough into the dairy container so as to create receptacles in the container for the fork's both ends. After you have melted the holes on the container and the fork / handle is now cooled, compress the fork enough to seat both ends in the container. When the fork goes back to its handle shape its tension will keep it seated. Now, you have a paint holder that can hold one liter of paint or stain or whatever. If you are up to it, you can tape a rare earth magnet to the inside of the paint container to hold your brush upright. The pictures are pretty self explanatory.

 RSS Feed
